To add Map marker go to Dashboard-->Reactive-->Geobox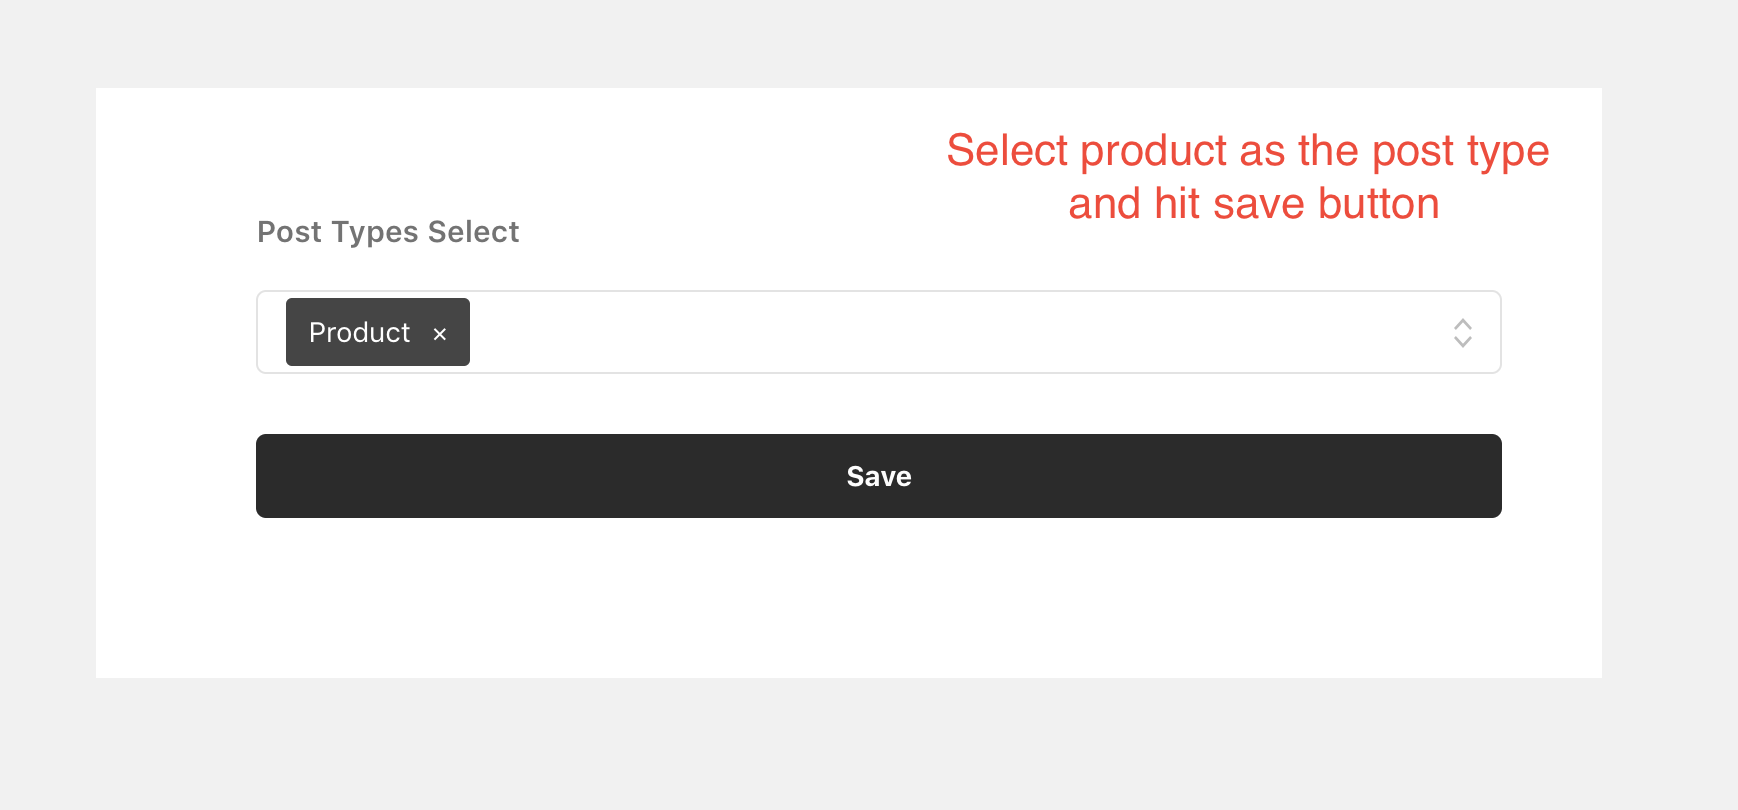 Now go to your Products-->All Products-->Edit Product
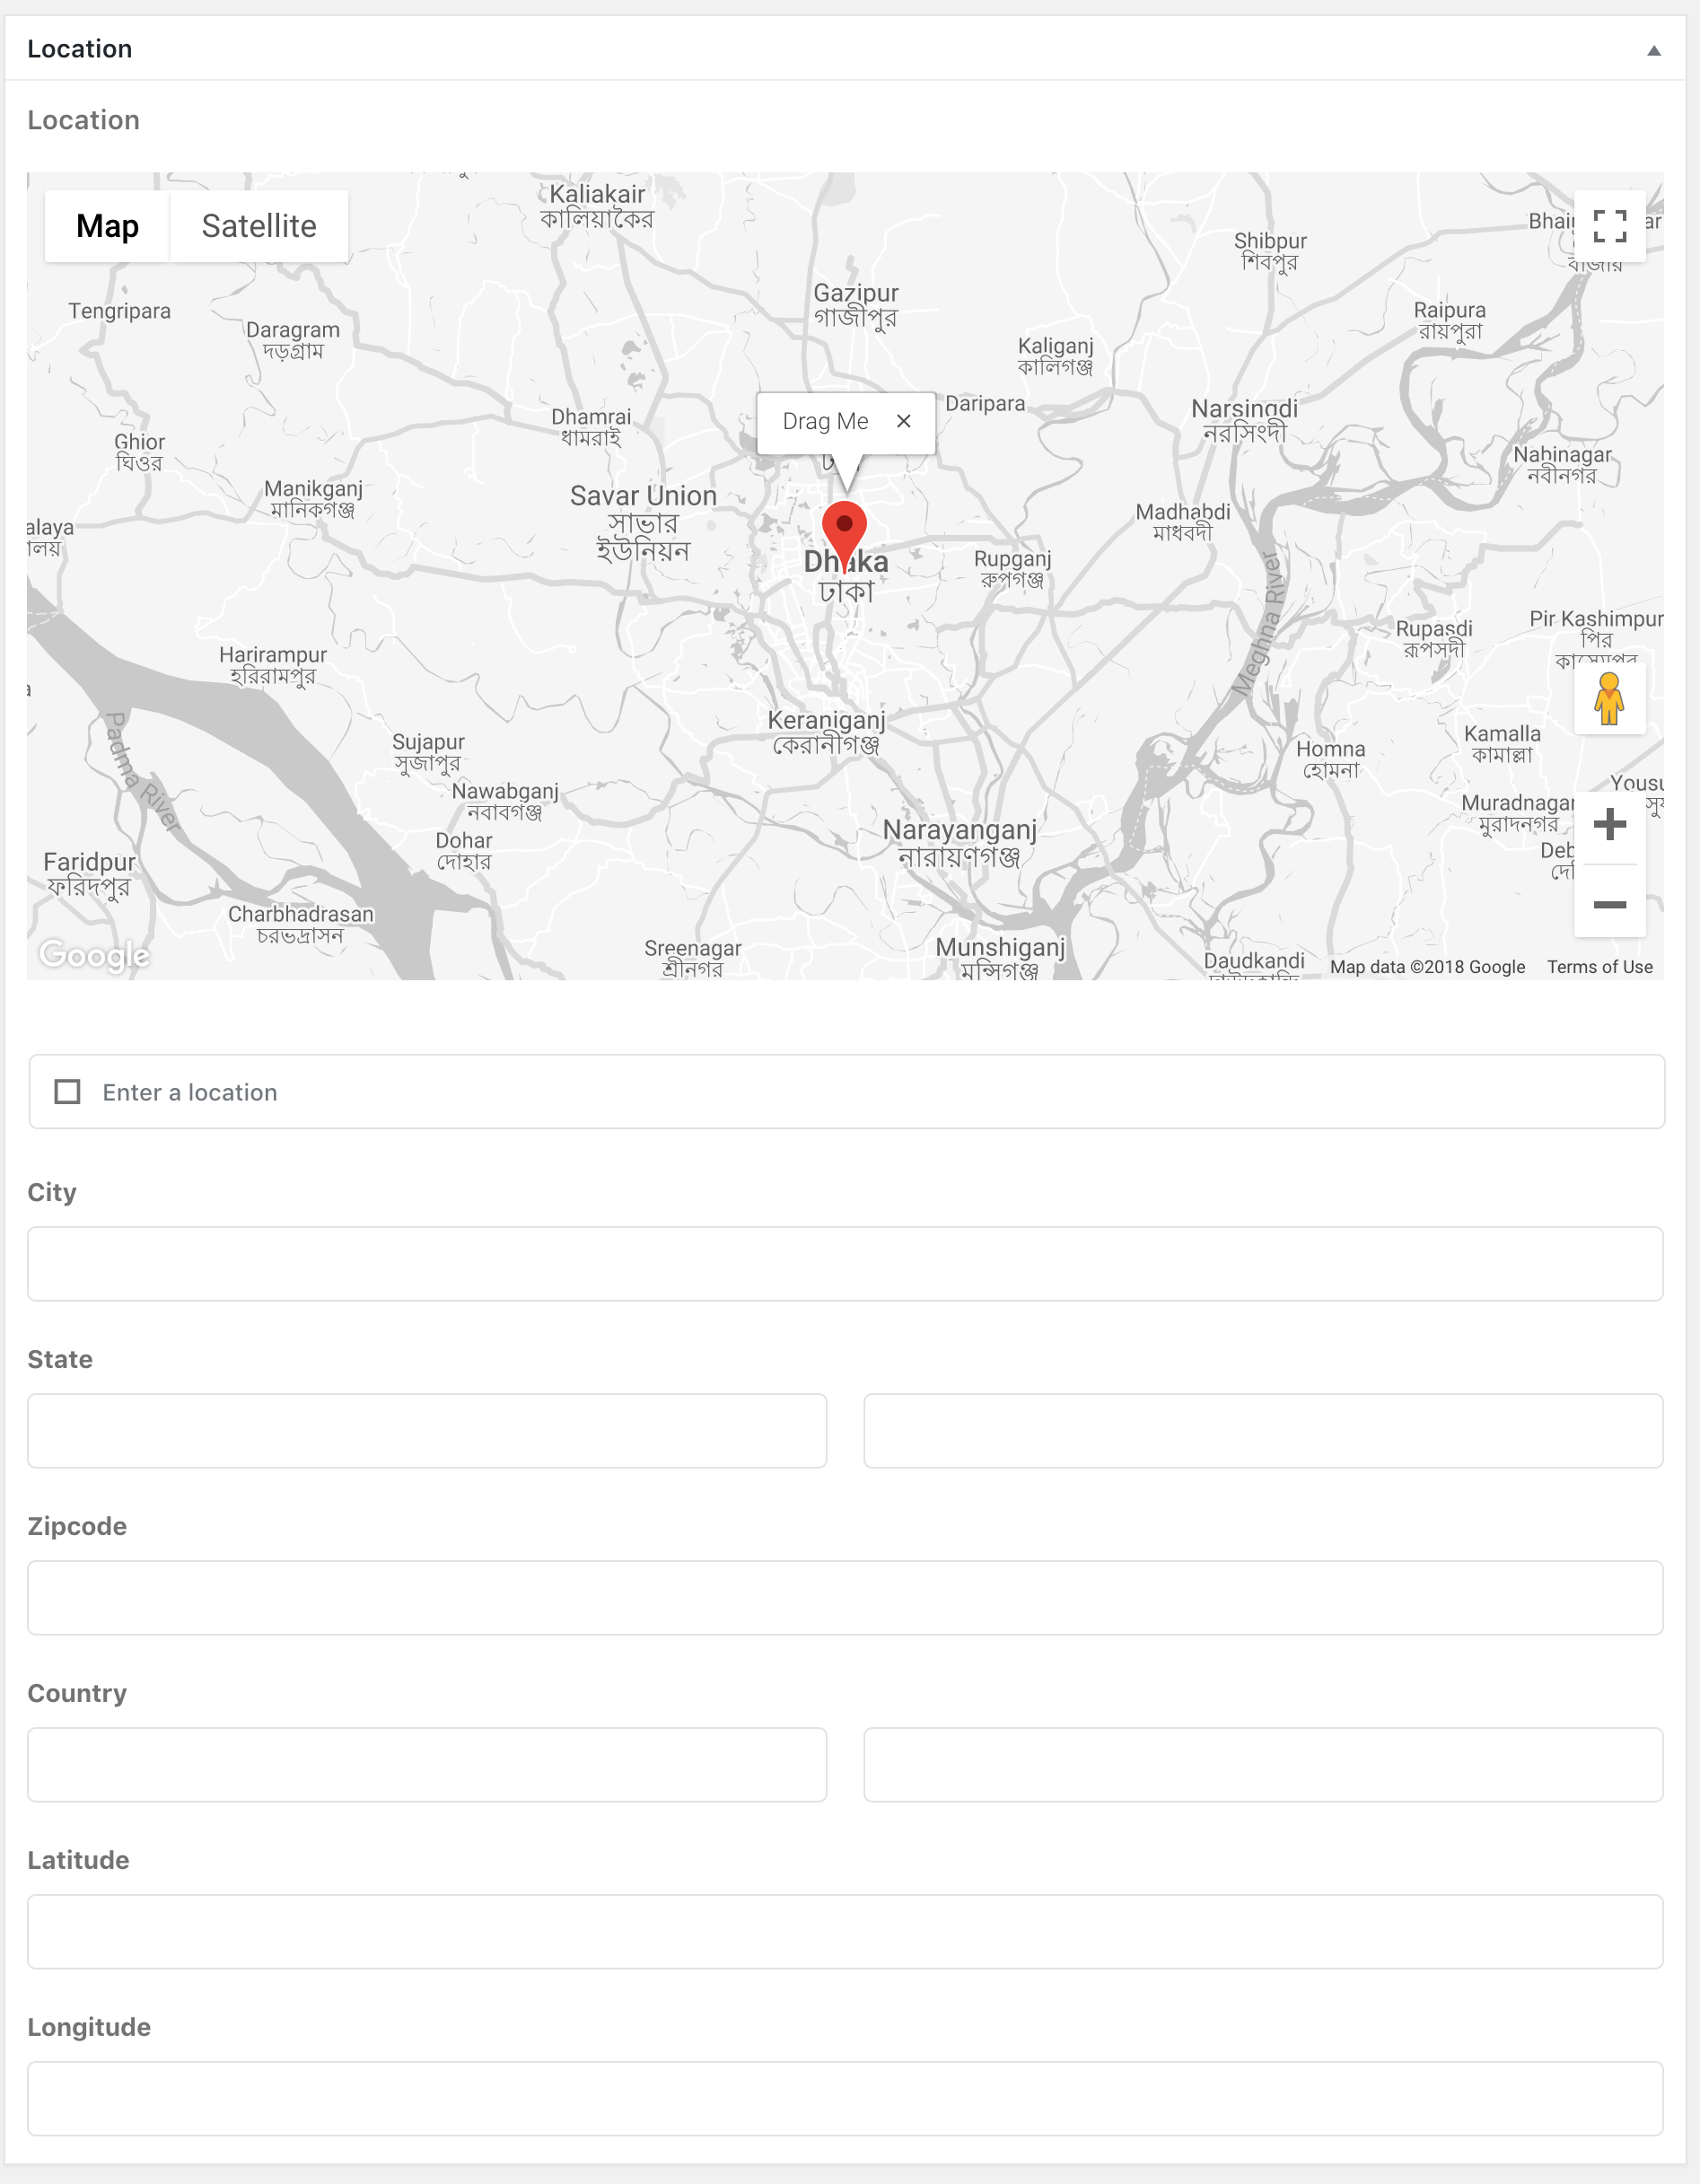 Here you can find location field, you can add your product location by dragging map marker on map or you can add location data by searching on location field.
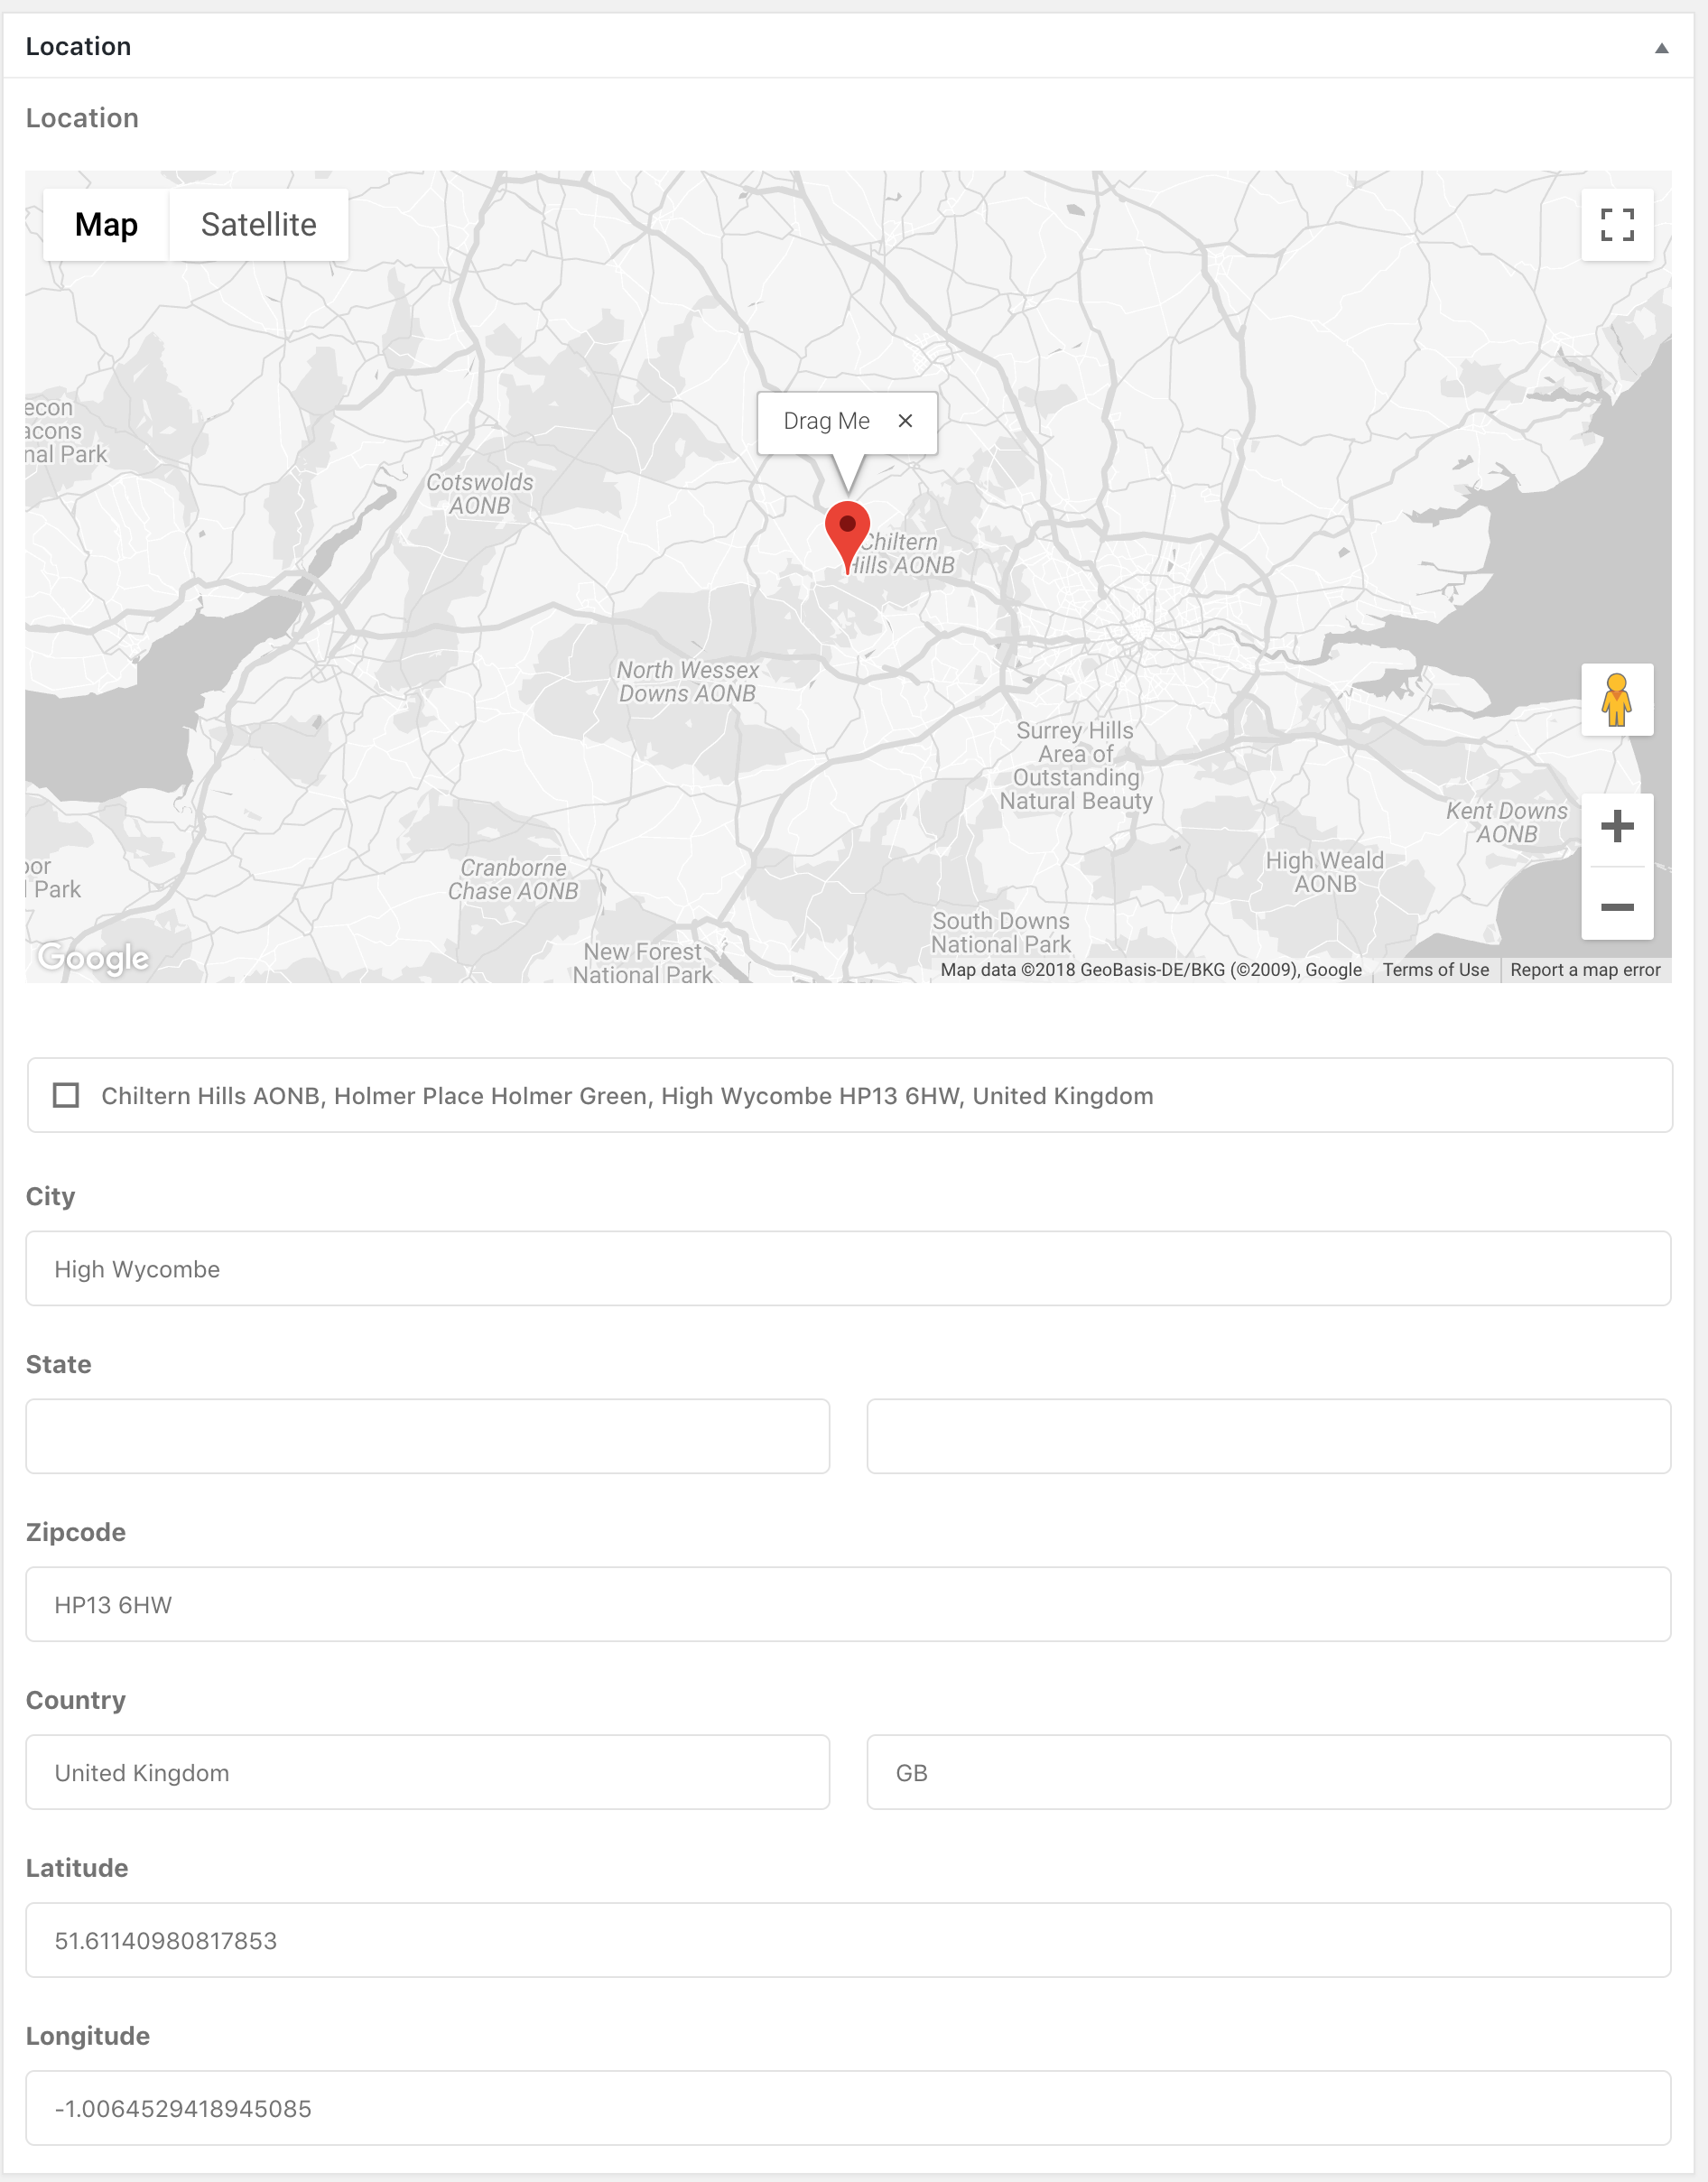 After providing product location data you will have this output on home page in map as product location.
 You may notice that our map marker design is not similar to our demo. Here is a procedure to change map marker design. Go to Dashboard-->Reactive Templates-->All Map Marker Template-->Add New Map Marker Template. Then put this below code.
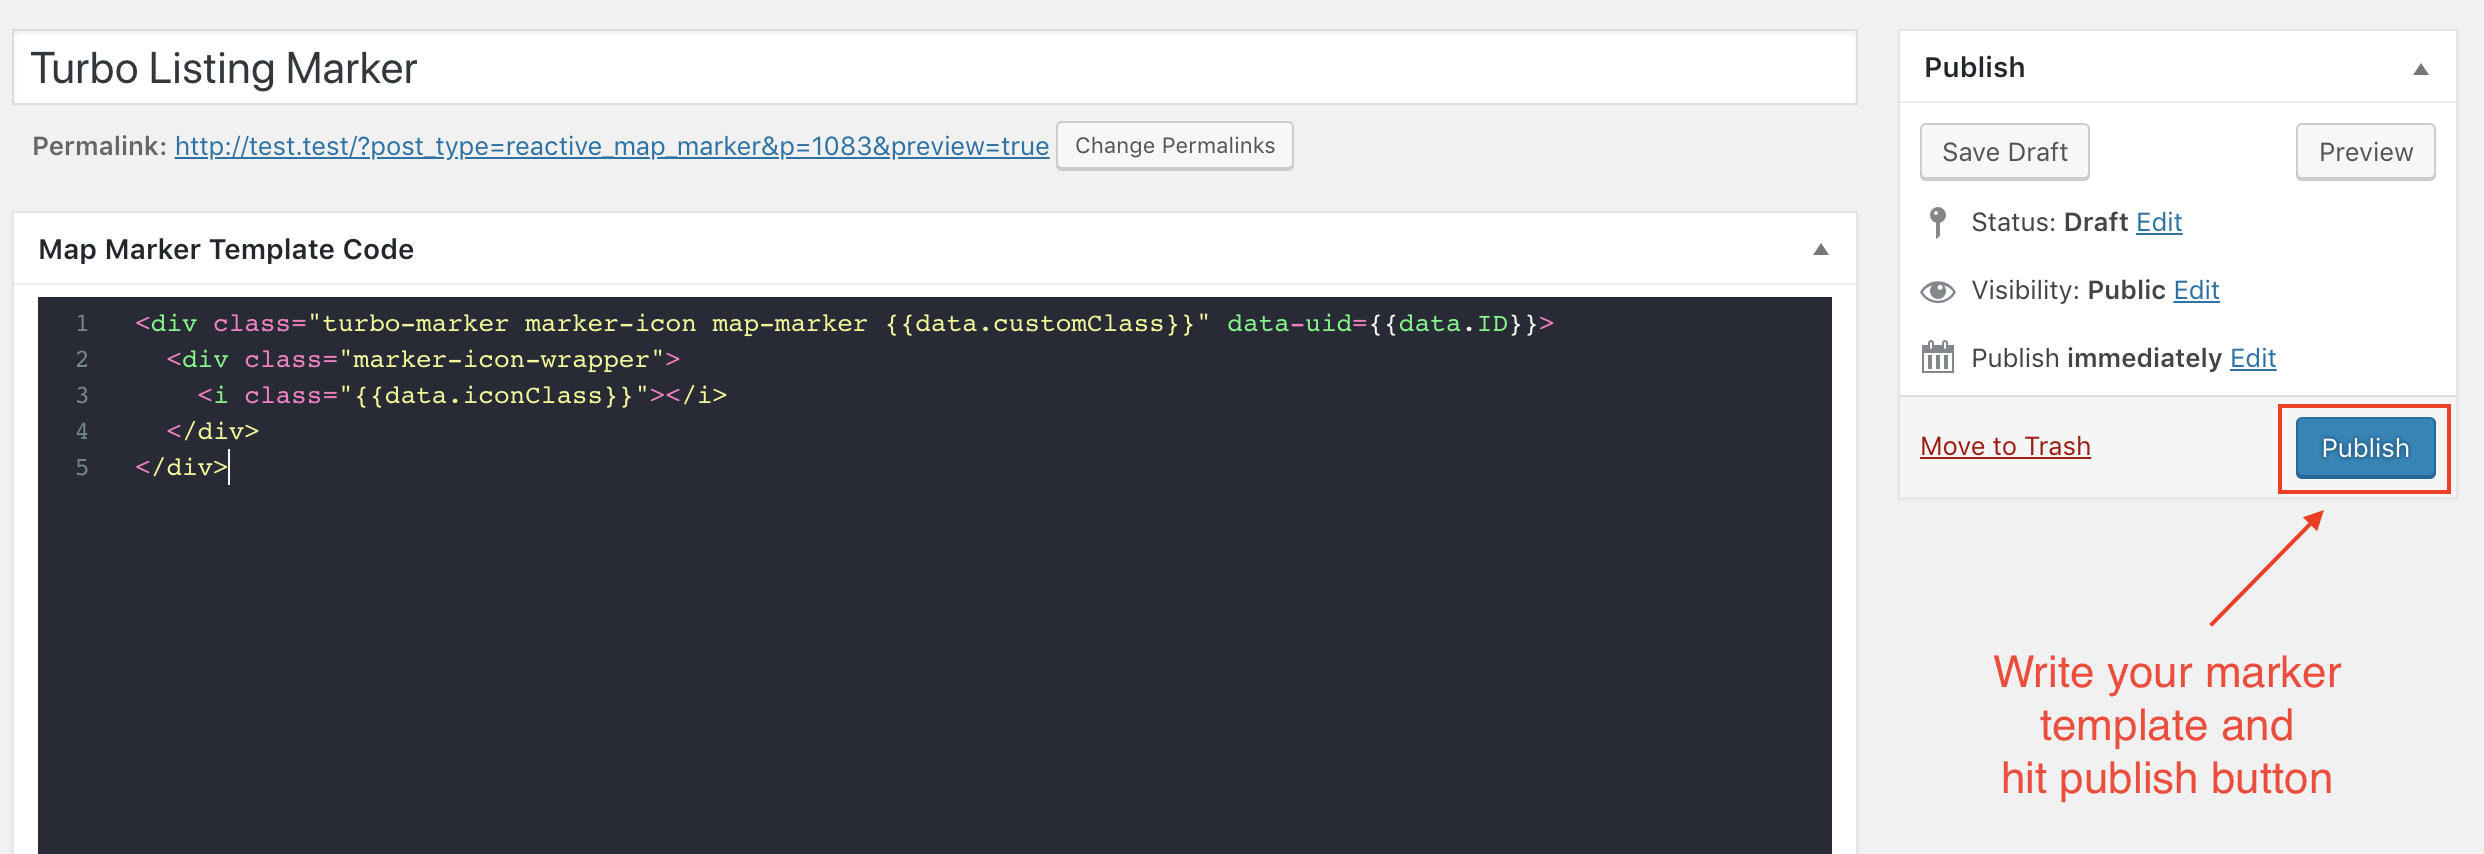
<div class="turbo-marker marker-icon map-marker {{data.customClass}}" data-uid={{data.ID}}>
    <div class="marker-icon-wrapper">
      <i class="{{data.iconClass}}"></i>
    </div>
  </div>
Now go to Reactive Admin View and click on the Map settings icon. Here you can find the Template tab. Select your Map Marker Template. Here Turbo Listing Marker is the template you have created previously. After selecting Map Marker Template you will have this output on home page.
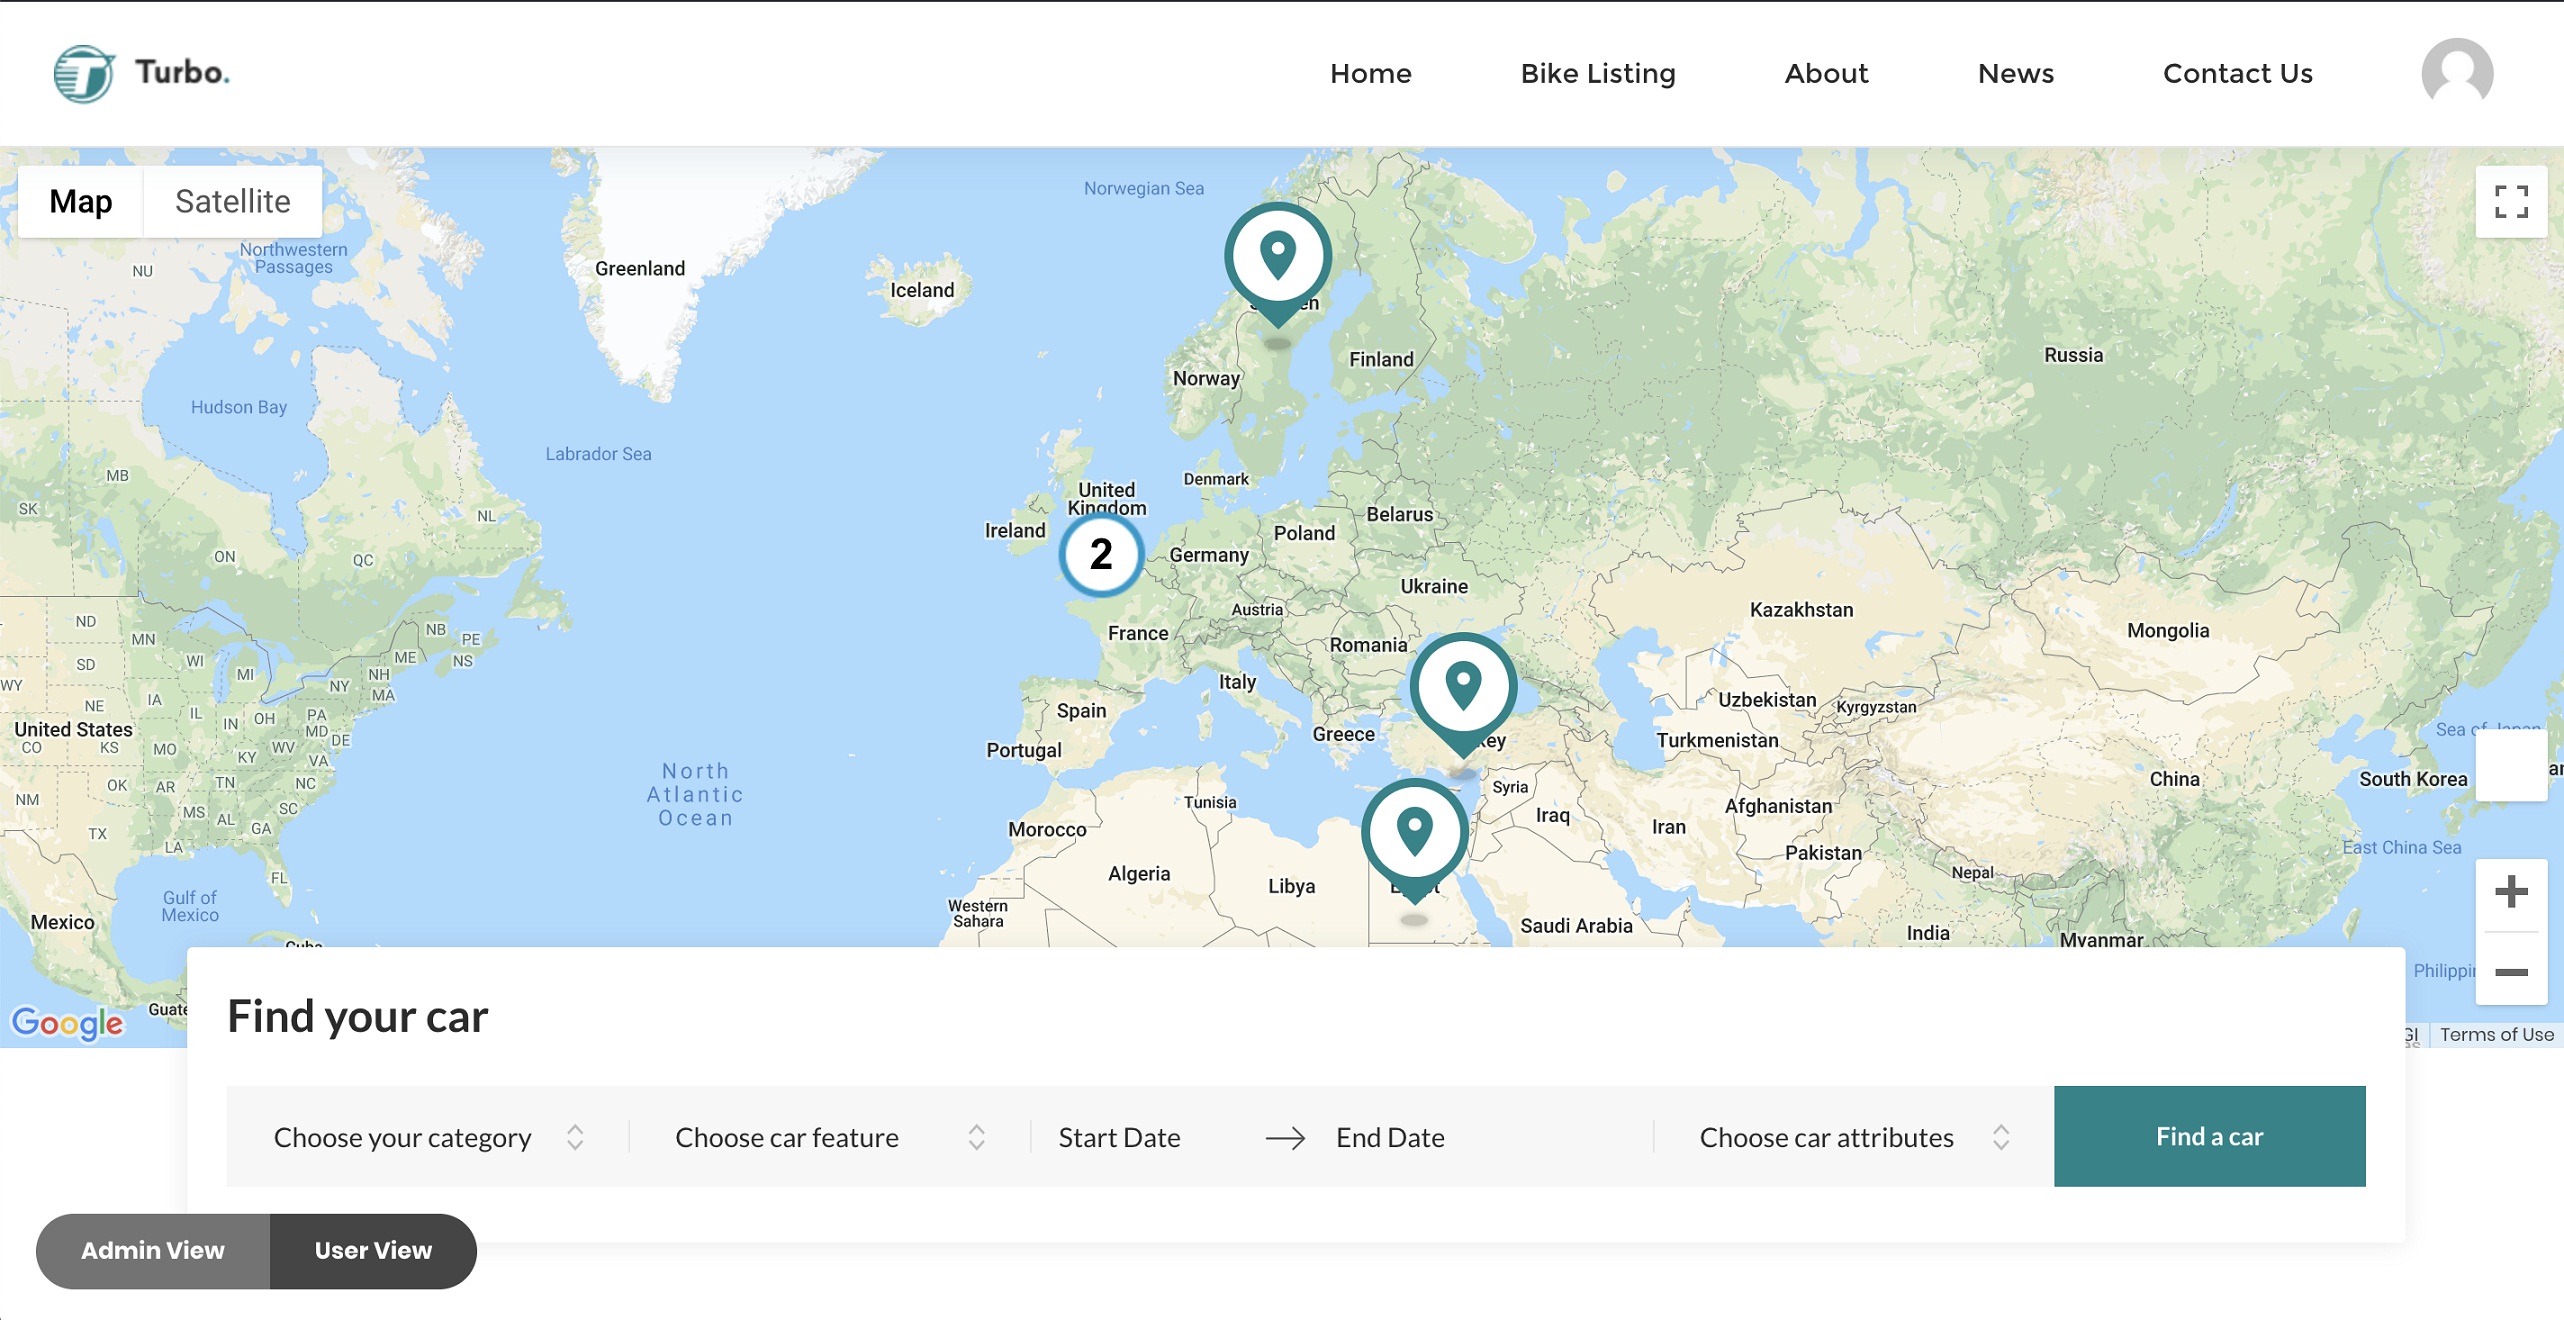 Now it is time to set Map Info Window Template. Go to Dashboard-->Reactive Templates-->Map Info Window Template-->Add New Map Info Window Template.
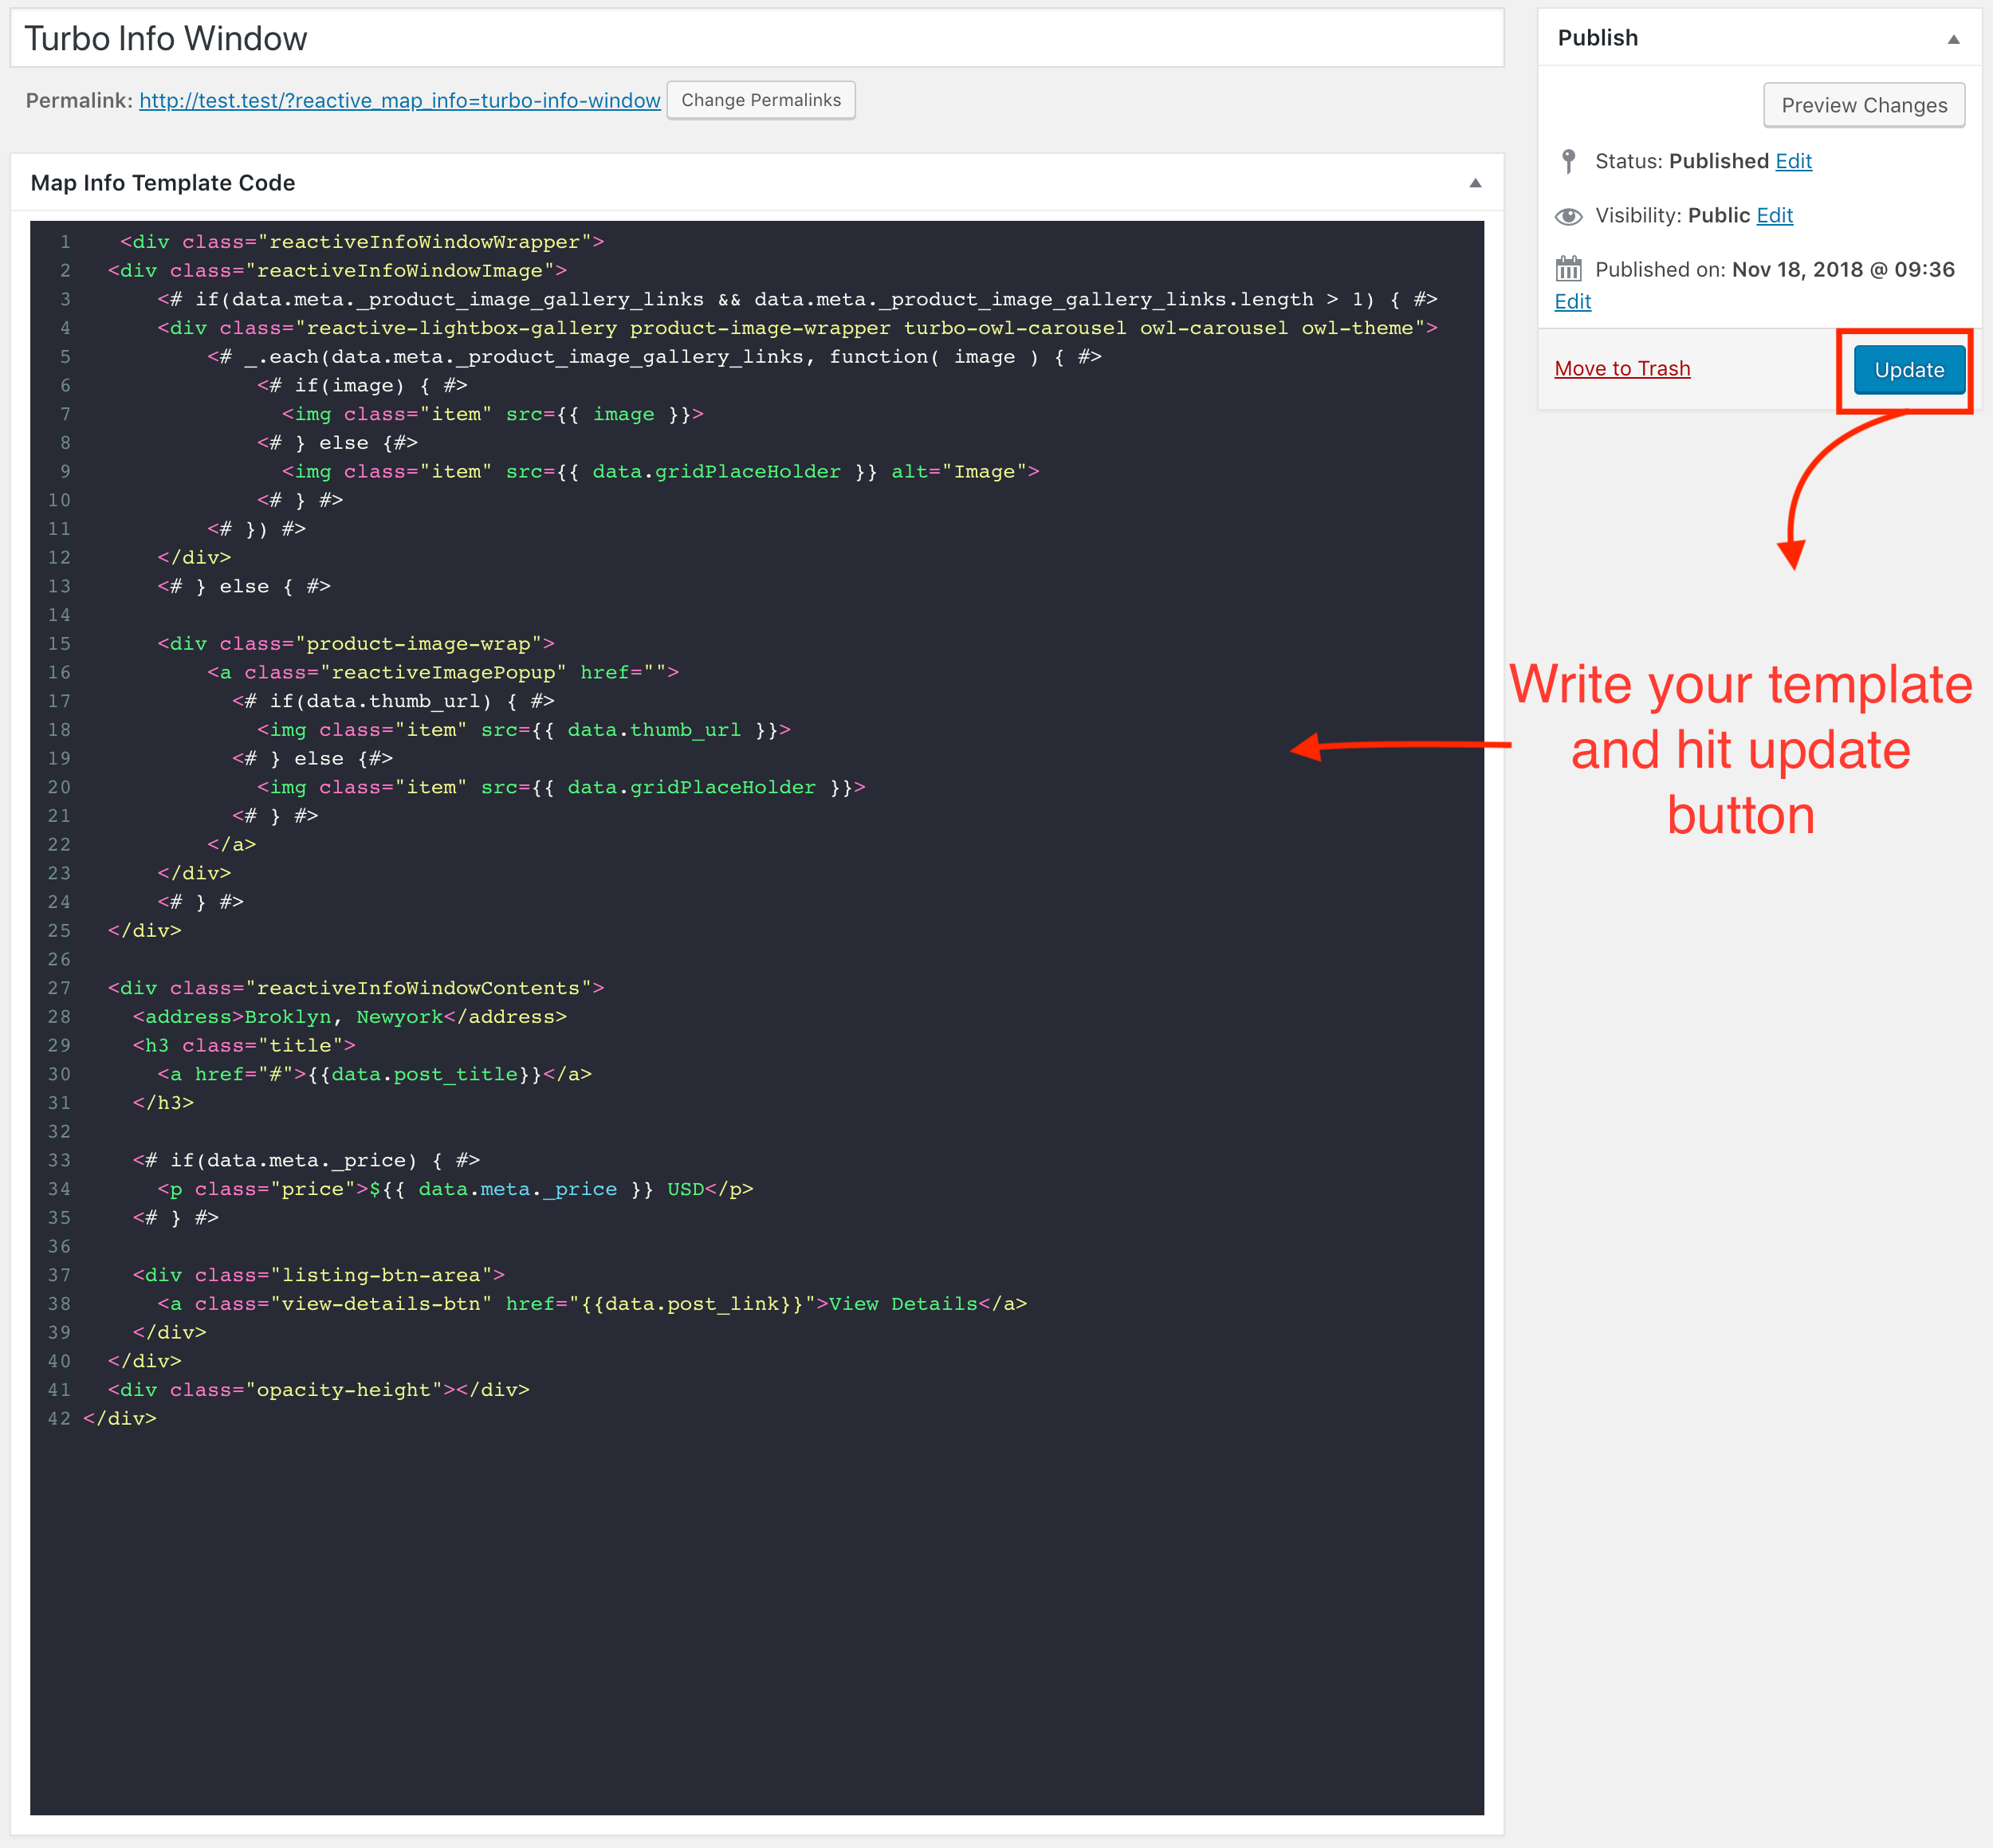
<div class="reactiveInfoWindowWrapper">
  <div class="reactiveInfoWindowImage">
      <# if(data.meta._product_image_gallery_links && data.meta._product_image_gallery_links.length > 1) { #>
      <div class="reactive-lightbox-gallery product-image-wrapper turbo-owl-carousel owl-carousel owl-theme">
          <# _.each(data.meta._product_image_gallery_links, function( image ) { #>
              <# if(image) { #>
                <img class="item" src={{ image }}>
              <# } else {#>
                <img class="item" src={{ data.gridPlaceHolder }} alt="Image">
              <# } #>
          <# }) #>
      </div>
      <# } else { #>

      <div class="product-image-wrap">
          <a class="reactiveImagePopup" href="">
            <# if(data.thumb_url) { #>
              <img class="item" src={{ data.thumb_url }}>
            <# } else {#>
              <img class="item" src={{ data.gridPlaceHolder }}>
            <# } #>
          </a>
      </div>
      <# } #>
  </div>

  <div class="reactiveInfoWindowContents">
    <address>Broklyn, Newyork</address>
    <h3 class="title">
      <a href="#">{{data.post_title}}</a>
    </h3>

    <# if(data.meta._price) { #>
      <p class="price">${{ data.meta._price }} USD</p>
    <# } #>

    <div class="listing-btn-area">
      <a class="view-details-btn" href="{{data.post_link}}">View Details</a>
    </div>
  </div>
  <div class="opacity-height"></div>
</div>
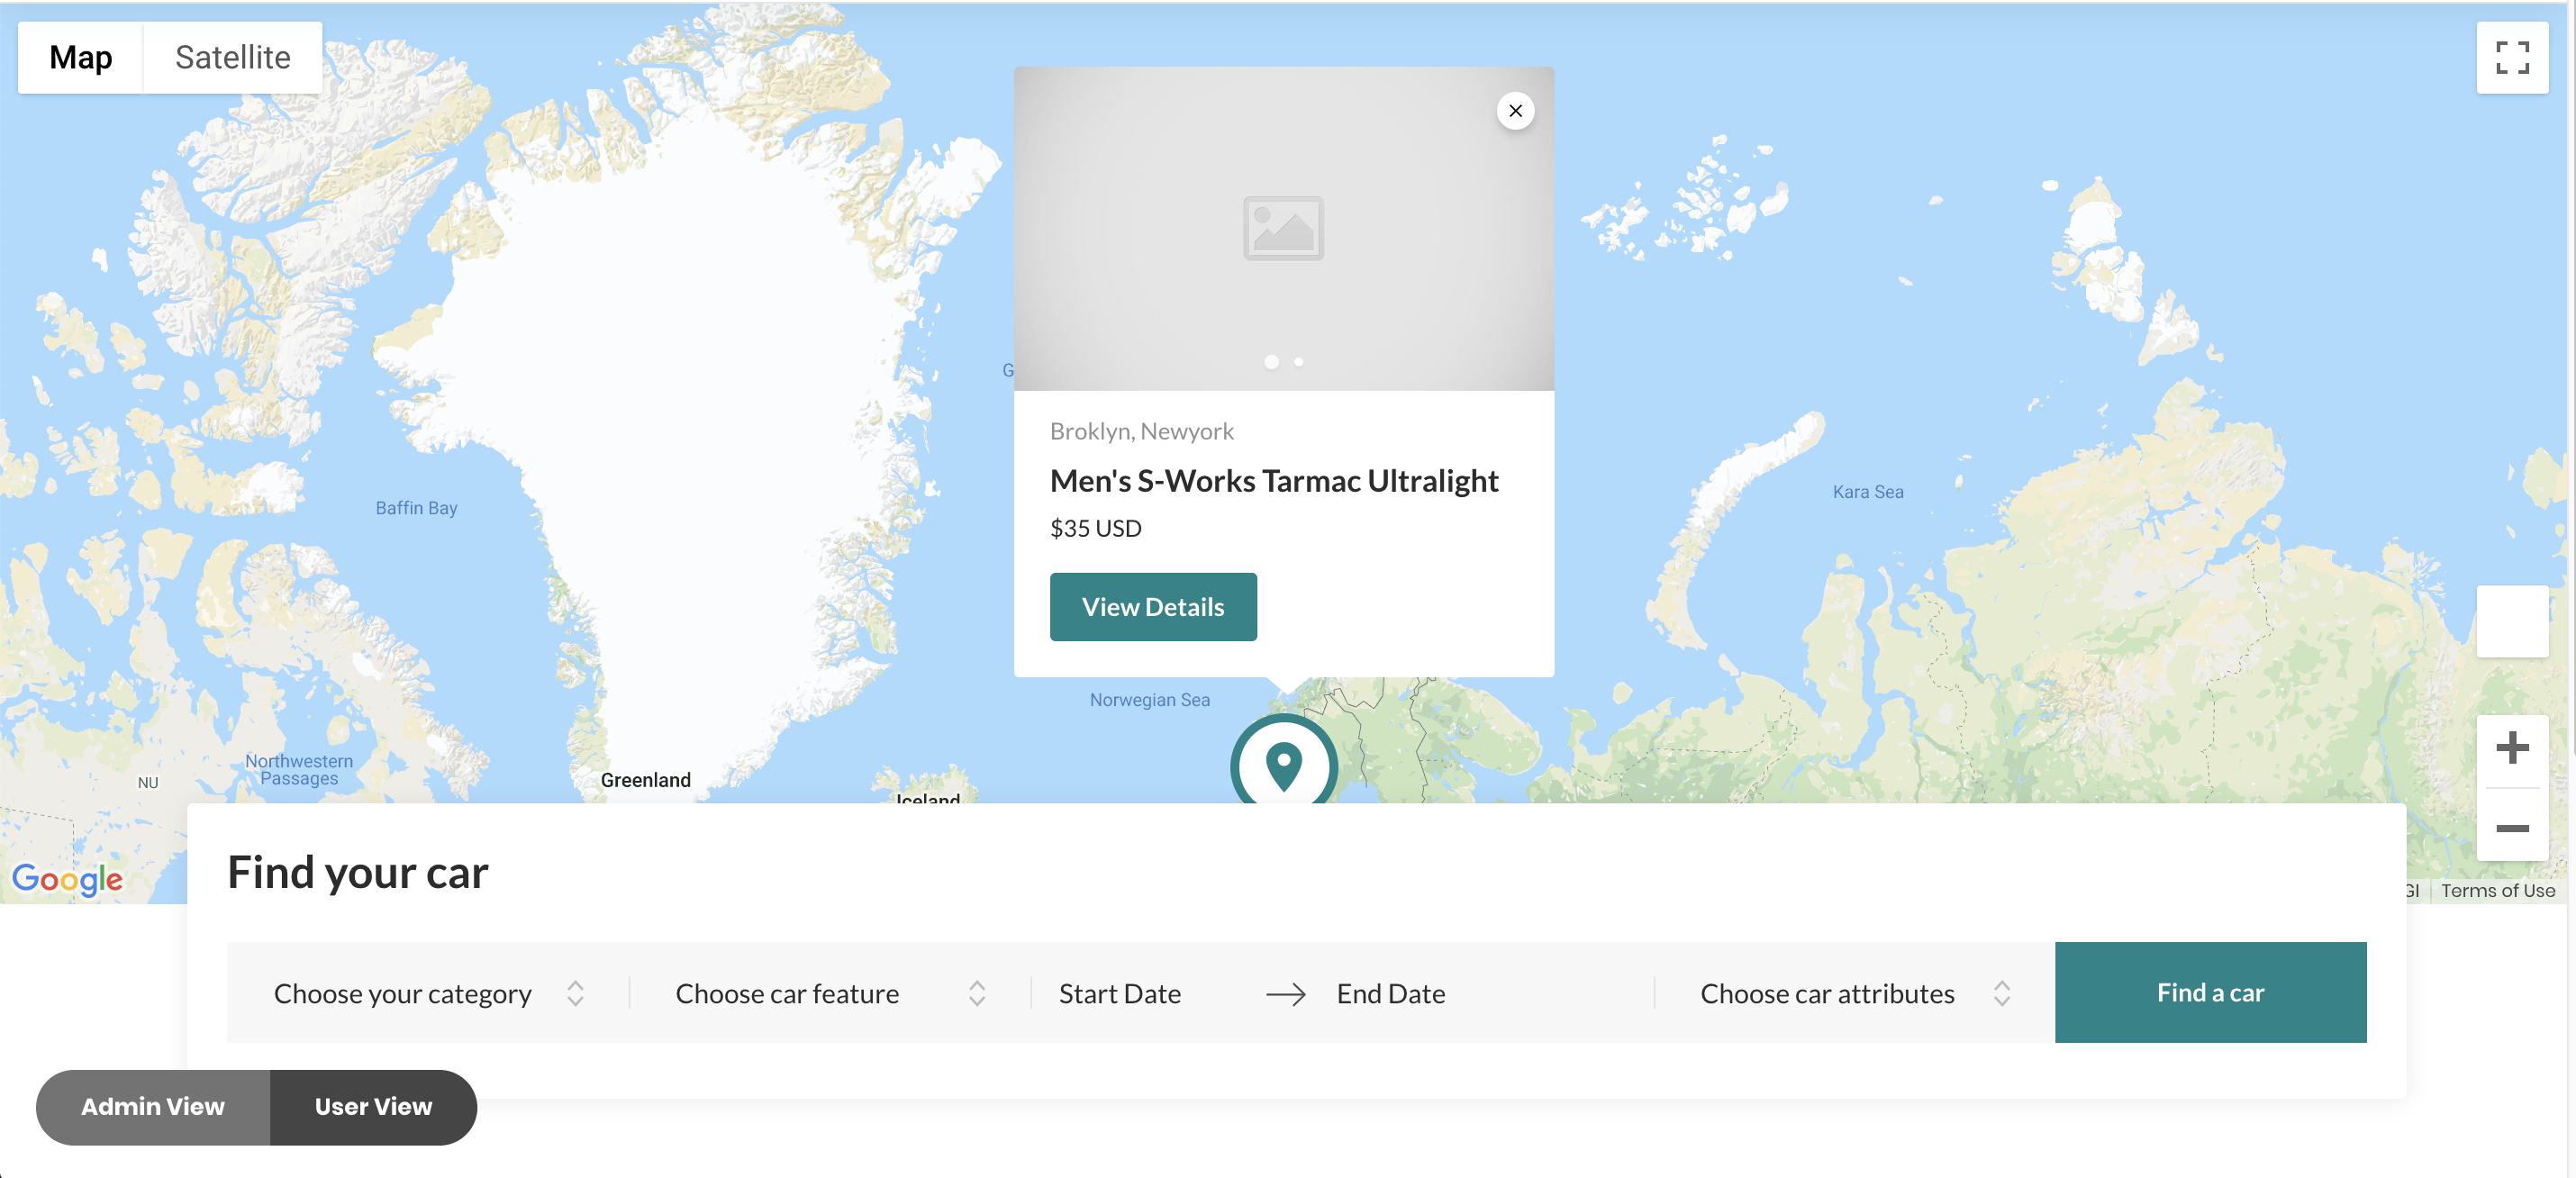
Now go to home page and click on the settings icon of Map. From Map go to Template tab and select your Info Window Template just you have created previously and click on save button.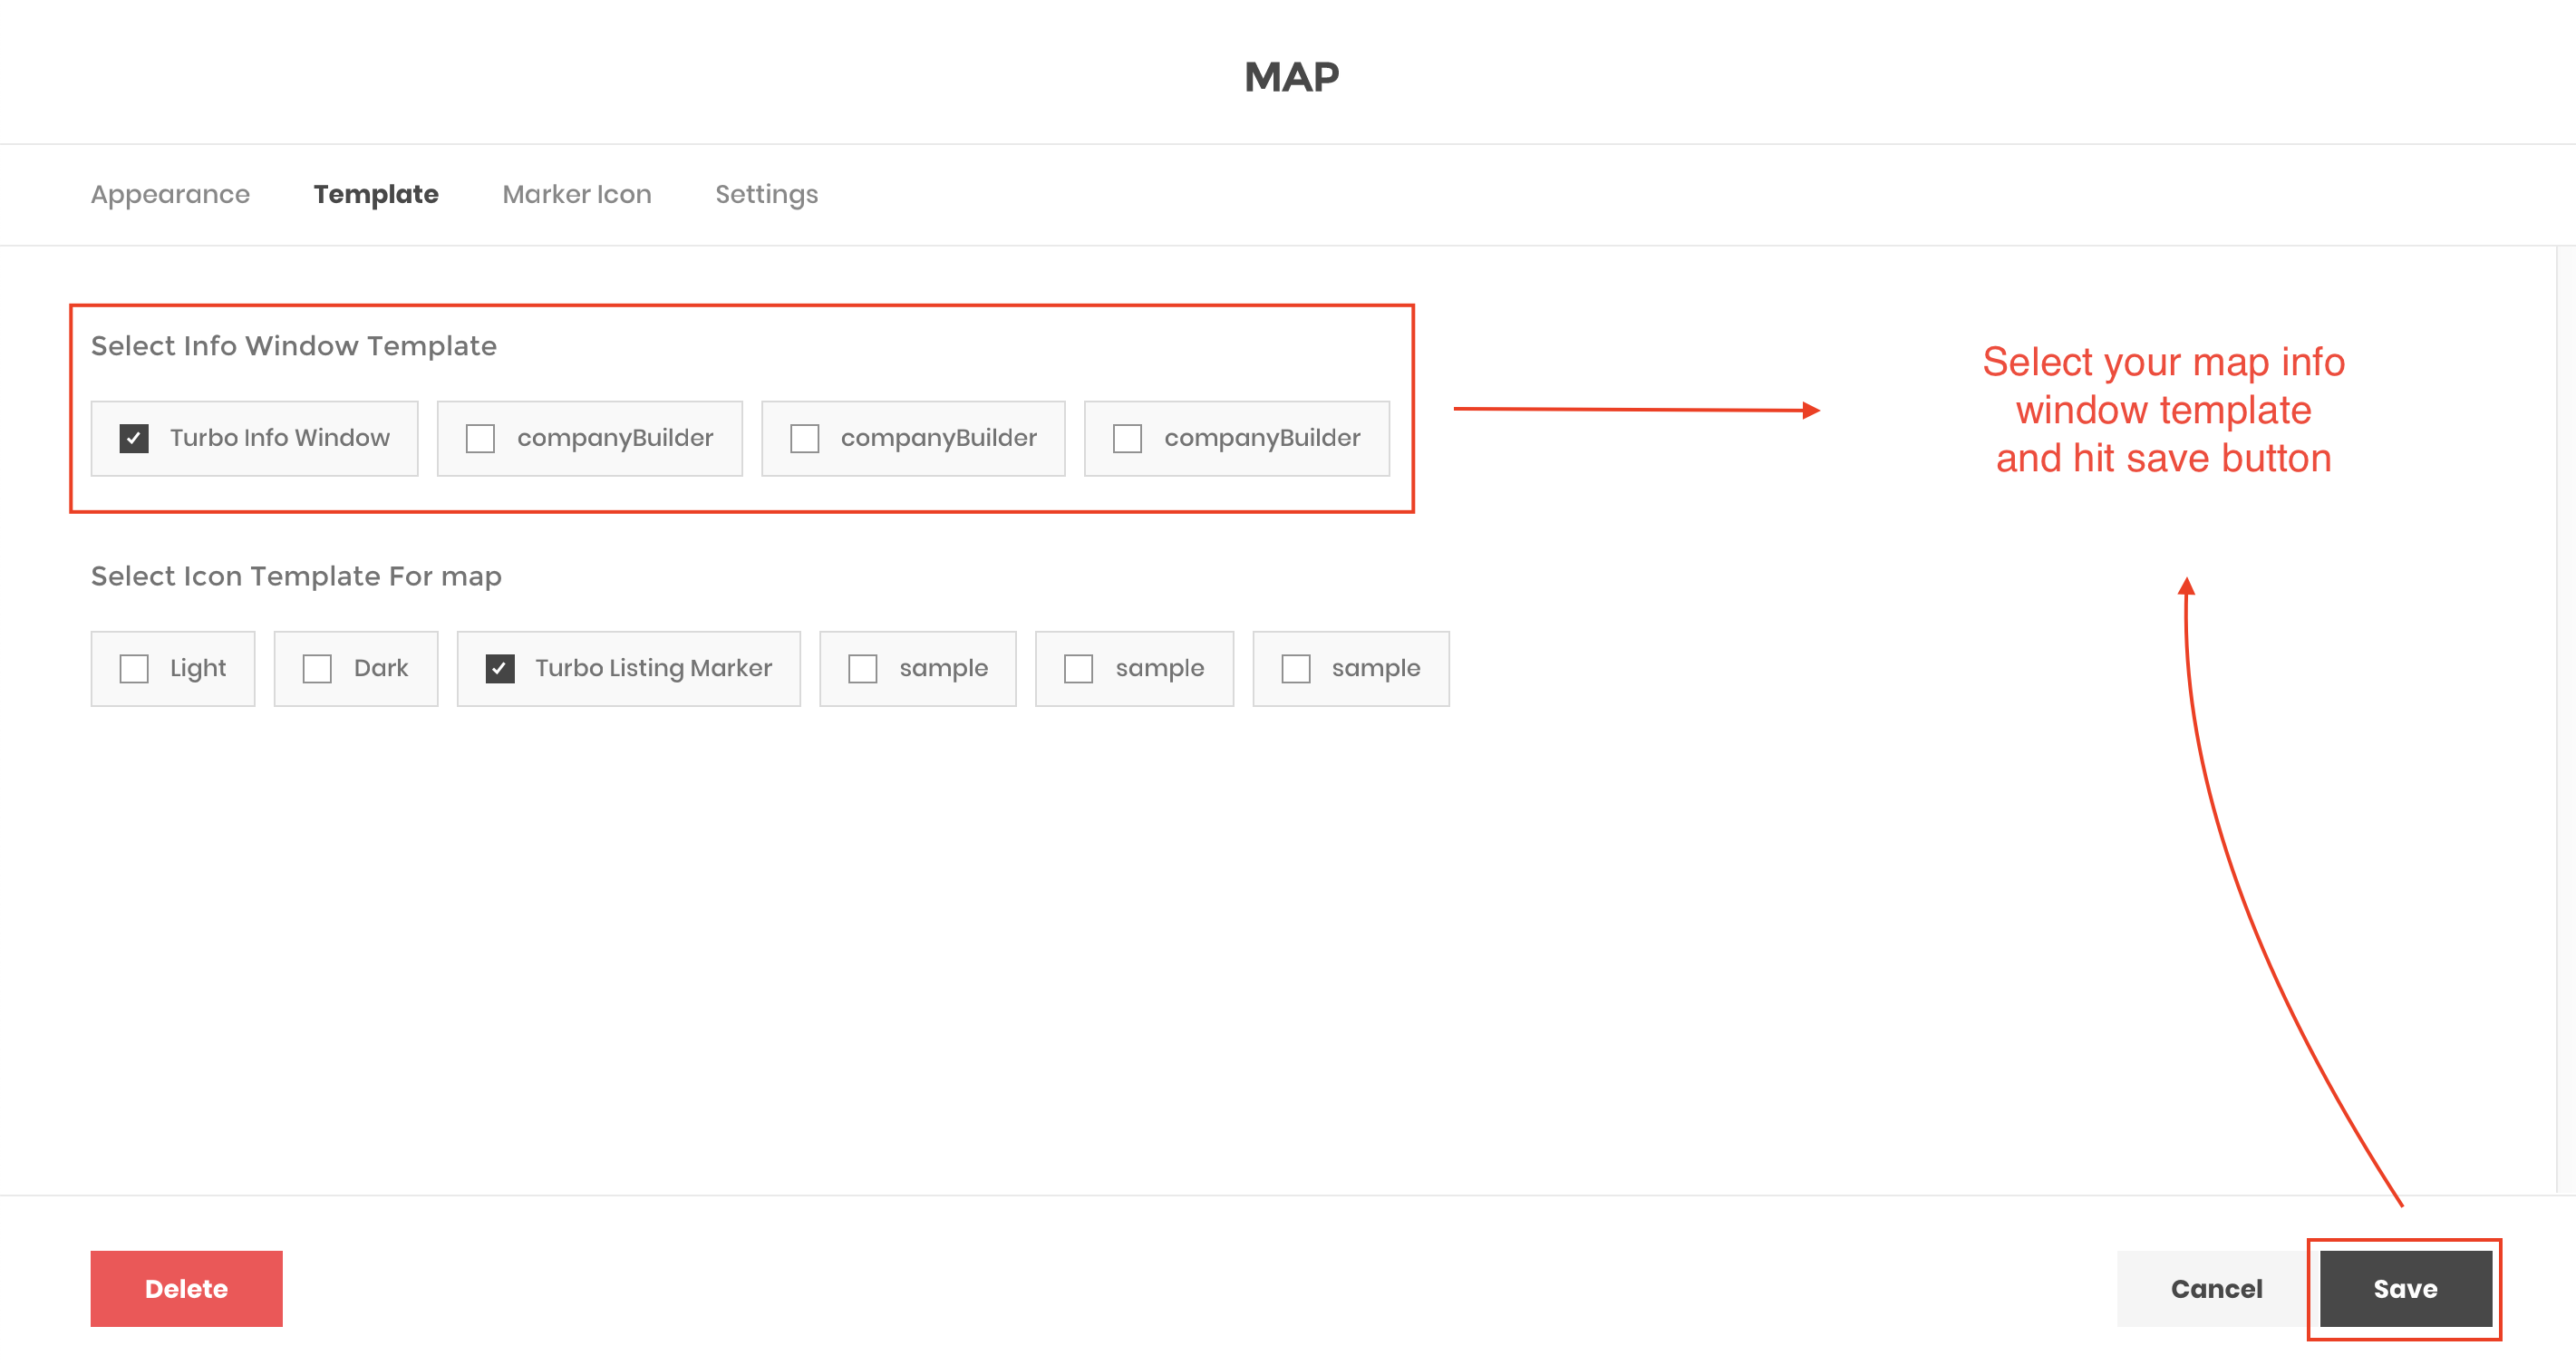
Now you have Map Info Window in home page's Map while you click on the marker.